How do I make a folding desk calendar?
It's pretty easy. Here are the steps:
-
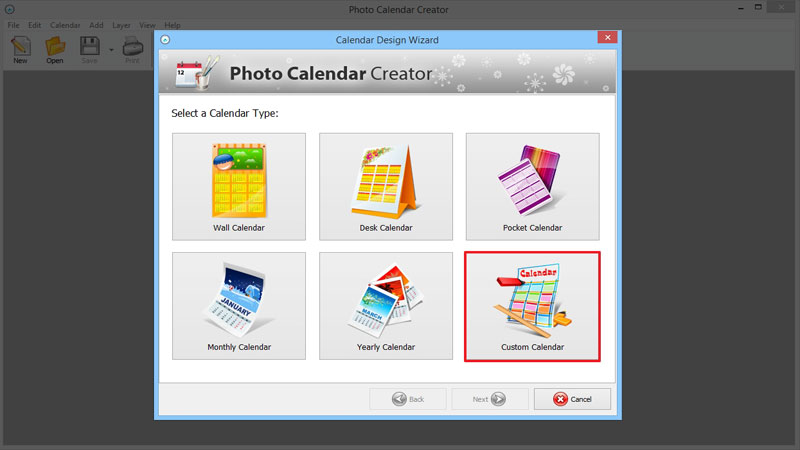
Start with a new project. When it comes to choosing a calendar type, click Custom Calendar.

-
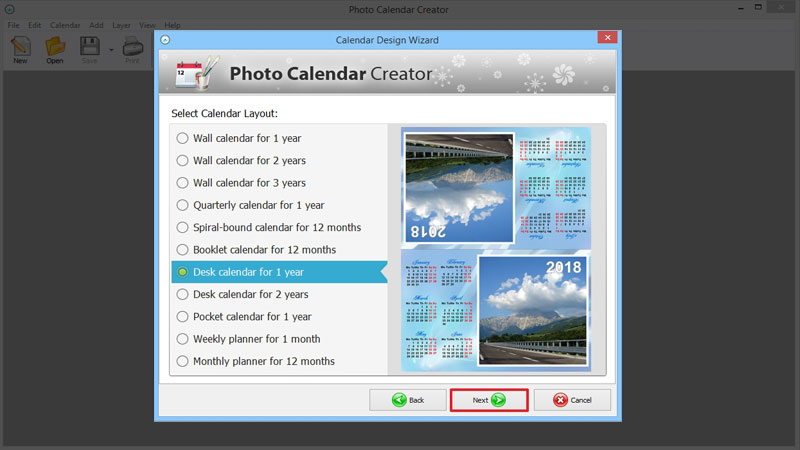
Now pick a Desk calendar from the list and click Next. You can also select a desk calendar for 2 years if necessary.

-
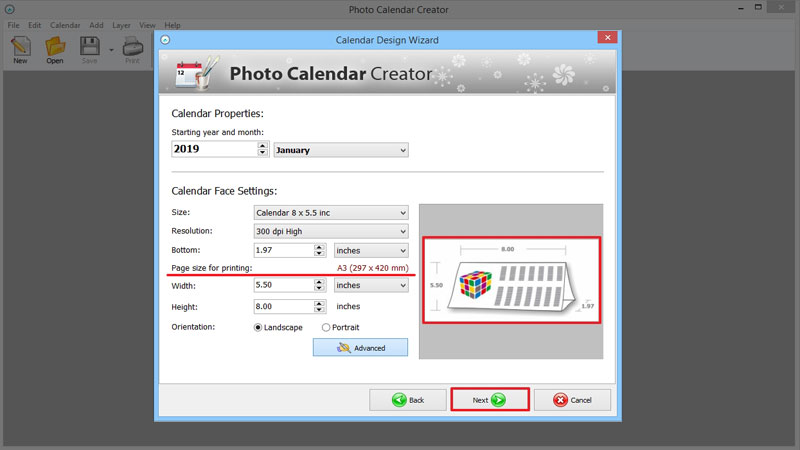
On the final stage, select the size of your calendar. The preview on the left shows the actual dimensions and how the calendar will look like. Note that the calendar size should correspond to the paper used for printing. Check what size you should take - it's shown in Calendar Face Settings. When done, click Next.

-
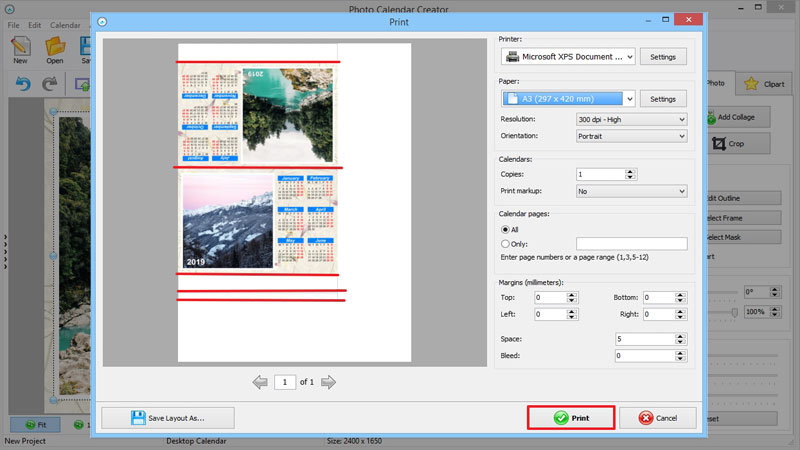
When you've finished with designing your calendar, it's high time to print it. In the Print window, you can see where the stand is located and where you should fold the calendar. You can print it right away or save as a layout for printing later.

